Share data lets you add data to your
dashboard, copy data into other records in your app, other Qrimp app, and even other websites.
Adding an item to your dashboard
See
Portals.
Sharing data
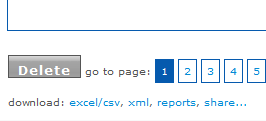
There are two ways to get to the share data interface: the link below the
grid view...

...and the Open Share icon in the
Content Header
When you click the link or the icon, you will see the following popup:

You will see two boxes with HTML. The HTML on the left is for sharing within your app. The HTML on the left is for sharing on the web.
Copy and Paste HTML
Copy and paste a snippet of
HTML code. You do not have to understand HTML to do this, but please go slowly and be sure to select and copy ALL of the text in the box!
You can paste this in a
portal, a
field template a description box, or any other
text area in your app. Experiment! If something doesn't work, you can delete it.
This snippet of HTML code pulls in the data and the view (see:
Views) and determines whether you are sharing an individual item or the whole table.
Sharing data internally
To share data within your Qrimp App, copy the text (Ctrl+c) from the first share data script and paste it (Ctrl+v) into any text field in any table. The table you have selected will magically pop into that area. The text field must be pasted into a table that is in the same app as the HTML.
Sharing data externally
To embed your data into a separate Qrimp application or display it on another domain, copy the text (Ctrl+c) from the second share data script and paste it (Ctrl+v) into any text field on one of your other Qrimp apps or on any website that allows you to embed HTML and/or scripts.
If
Anonymous Access is not allowed for your data and you share the code in a publicly viewable area of your app, the data will not be visible (see:
Table Security).
Custom HTML Templates for Shared Data
You can build your own HTML template to format the shared data so that it will appear in your host page exactly the way you want it. Use
square brackets to insert particular data items into the HTML template.
Advanced: Sharing data to a local file
You can paste the code for your shared data into any file that you can view with your web browser (save as .html). The first time you are opening a local file that contains a script to pull in shared data, you will need to be online to access the data (does not apply to
Qrimp Server users). If your data is not visible to 'Anonymous' users (see:
Table Security), you will have to log in.
Once you have viewed the data, you can save the HTML to the file before closing for offline viewing.
Shared Data Display Options
Use
Query String Parameters to sort and limit which data is displayed.
Use HTML and
inline css to style your shared data.
Images in Shared Data
To ensure that the images and links referenced in your shared data area appear properly wherever you share them, use absolute urls rather than relative urls to reference them within your original table.
Who can share data?
The share data link is not visible to all users by default. To allow a group to share data, you must allow
User Groups to view the export options.
Open Share Icon
To simplify the process of sharing data, you can add a module called Open Share Icon available under Admin > Add Module. This module will add an icon to your headers next to the search icon that will open a lightbox with the same content as clicking the share button below the grid view. The Share Icon will be visible on more pages and easier to access than the share link.
 Read more about the Open Share Icon
Learn about other
Export Options.