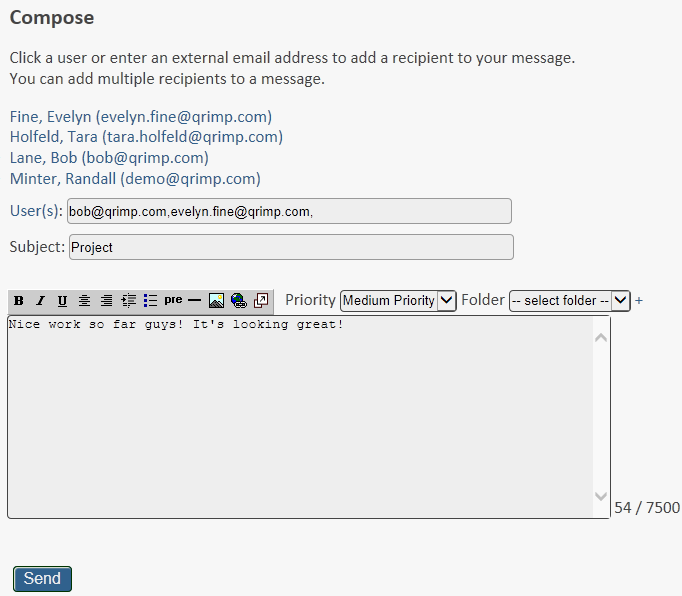
Select the user(s) to send the message to by clicking a username, or enter an email address into the users box. Messages sent to external recipients via email will not be logged in the Messages table by default.
Logging messages sent to external email addresses
To track messages sent to external email addresses go to Develop > Manage Tables. Select the Messages table and click "edit". Add a field called ToEmail with a data type of Email Address.
Creating Contacts Automatically
You can set up your Qrimp app to automatically create an entry in your Contacts table when you send an email to a new external contact. If you do not have a contacts table, create a table with at minimum the fields mentioned below. If you already have a Contacts table, go to Develop > Manage Tables, select Contacts > edit, and add the following columns:
Name - Single Line Text 100
Description - Multiline text 500 or greater
Email - Email Address
Now when you send a message to an external email, the Name and Email fields will both show the email address. The description field will indicate that the contact was created from a message from within your Qrimp app. You can edit these fields later with more details.
Logging Contact Interactions
If you have or create an Interactions table, you can log interactions with existing contacts using the Qrimp messaging system. First, follow the instructions above for "Creating Contacts Automatically". Then add a table called Interactions, or add the following columns to your Interactions table:
Name - Single line Text 255
ContactId - Pick From Contacts
InteractionDate - DateTime
Description - Multiline Text 5000+
Click the check boxes for auditing and versioning.
Once you've built the contacts and interactions table, messages you send to external users from your Qrimp app will be logged. This data makes a great addition to a CRM and can be very useful on [Reports].
Messaging about items in your database tables
To use this feature, you must be comfortable with query string urls.
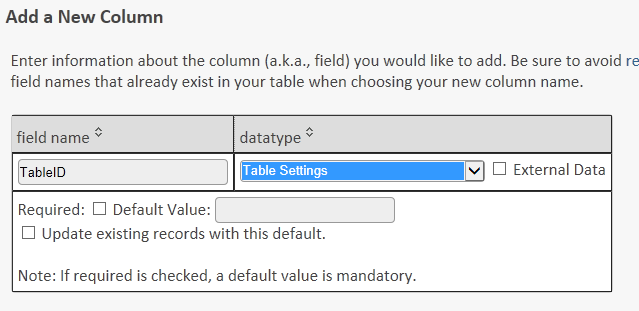
You can add the ability to see messages about an item in a table. First, add two additional fields to the messages table:
TableId - Pick From Table Settings
ItemId - Number without Decimals
To send a message about a particular item, you must type in a url table that references the table you are mentioning. If you include a parameter to the tableid and itemid of an entity in your Qrimp App, the message will be created with the tableid and itemid specified. You can create the link like this:
messages.aspx?t=messages&compose=new&tableid=1000&itemid=1
In this case, the message will be logged as being sent about item 1 in the table 1000.
Install the messaging module to send messages in your Qrimp app. See [Adding Modules]
Sending Messages
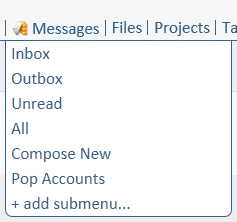
To send a message, go to Messages > Compose New.
Select the user(s) to send the message to by clicking a username, or enter an email address into the users box. Messages sent to external recipients via email will not be logged in the Messages table by default.
Logging messages sent to external email addresses
To track messages sent to external email addresses go to Develop > Manage Tables. Select the Messages table and click "edit". Add a field called ToEmail with a data type of Email Address.
Creating Contacts Automatically
You can set up your Qrimp app to automatically create an entry in your Contacts table when you send an email to a new external contact. If you do not have a contacts table, create a table with at minimum the fields mentioned below. If you already have a Contacts table, go to Develop > Manage Tables, select Contacts > edit, and add the following columns:
Name - Single Line Text 100
Description - Multiline text 500 or greater
Email - Email Address
Now when you send a message to an external email, the Name and Email fields will both show the email address. The description field will indicate that the contact was created from a message from within your Qrimp app. You can edit these fields later with more details.
Logging Contact Interactions
If you have or create an Interactions table, you can log interactions with existing contacts using the Qrimp messaging system. First, follow the instructions above for "Creating Contacts Automatically". Then add a table called Interactions, or add the following columns to your Interactions table:
Name - Single line Text 255
ContactId - Pick From Contacts
InteractionDate - DateTime
Description - Multiline Text 5000+
Click the check boxes for auditing and versioning.
Once you've built the contacts and interactions table, messages you send to external users from your Qrimp app will be logged. This data makes a great addition to a CRM and can be very useful on [Reports].
Messaging about items in your database tables
To use this feature, you must be comfortable with query string urls.
You can add the ability to see messages about an item in a table. First, add two additional fields to the messages table:
TableId - Pick From Table Settings
ItemId - Number without Decimals
To send a message about a particular item, you must type in a url table that references the table you are mentioning. If you include a parameter to the tableid and itemid of an entity in your Qrimp App, the message will be created with the tableid and itemid specified. You can create the link like this:
messages.aspx?t=messages&compose=new&tableid=1000&itemid=1
In this case, the message will be logged as being sent about item 1 in the table 1000.